

Can I Increase My Septic Tank For Bigger House
Alexander is a professional engineer who specializes in the construction of affordable houses and structures using recycled materials.
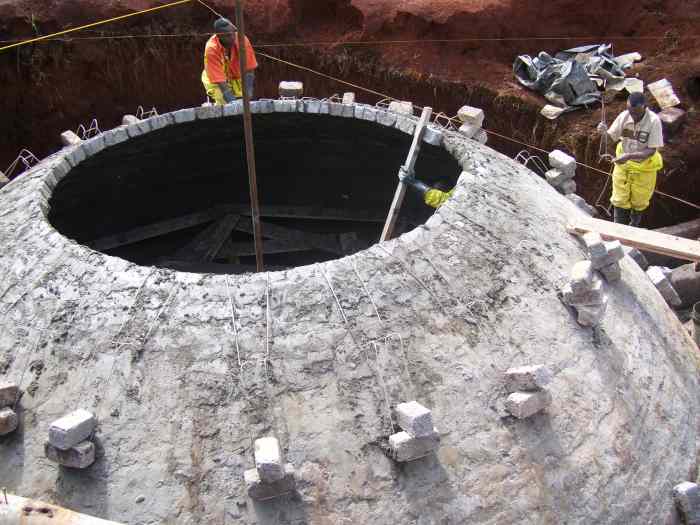
Biodigester septic tank
SuSanA Secretariat, CC BY 2.0
Wastewater Management and Treatment Solution
Over the last decade, many housing projects have decided to use biodigesters as a way to manage and treat wastewater. It has been adapted from the idea of a biogas plant that will reduce space, the amount used in maintenance, as well as the added benefits gained by using the digester to produce beneficial by-products.
In this article, you will read about how you can construct your own biogas plant or the biodigester septic tank. Let's get straight into it.
Construction of a Biodigester Septic Tank
Before anything, you have to have the design of your biogas plant, a prototype of what it should look like in the end. This is used to estimate the number of materials you will need and the estimated costs of the project. The biogas plant consists of a digester tank, where the organic material is stored and the microorganisms work on them to release gas.
The gas thus produced is collected in another tank known as a gas collector. In a floating type model, this tank is floating in the slurry and moves up-and-down based on the amount of gas stored in it. Then there's a guide pipe that helps the gas collector tank to move up-and-down inside the digester tank.
Waste is fed through feed pipe inside the digester tank. The fully digested slurry drains out through the outlet pipe. This can be collected, diluted and used as fertilizer for plants. Alternatively, a gas line from the gas collector tank is connected to give way to the biogas that helps in utilizing for home cooking and lighting.
With that in mind, let's get building.

Step 1: Select the Tanks
As mentioned above, you must have an idea of the waste produced form the house. You don't want to invest in a large tank whereas you only require like half of it. So check on your collectibles daily to get a rough estimate of your waste. The most common amount should be between 3.5 to 4 kilograms of waste from your entire household. That should be enough for an 800-liter digester tank, or something similar to that.
Next up, you have to look into other factors such as the model. There are various models you can use for your home, glacier, plain, or simply tank-like. But since you also want to capture biogas for your home use, one with a gas holder is best. The gasholder will be able to move up and down efficiently inside the digester.
Check the tank you choose to ensure it has a water seal between the digester and gas holder, just for safety reasons. Now because a biodigester has three chambers, get your three tanks together, all with excellent quality and resistance to weather conditions, and let's move to the next step.
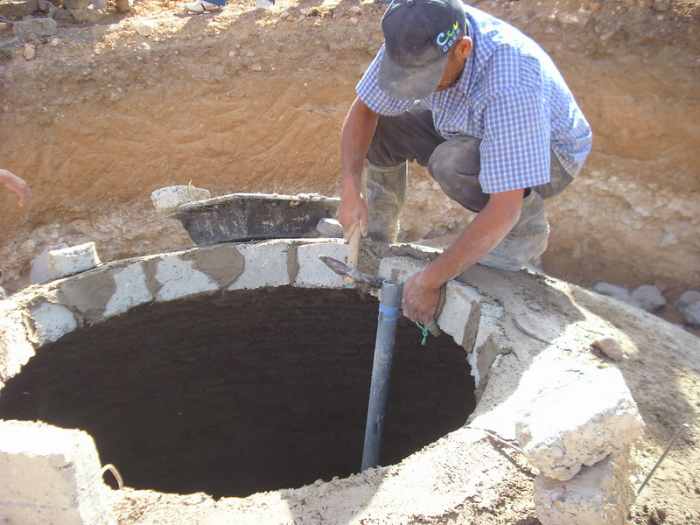
SuSanA Secretariat, CC BY 2.0
Step 2: Gather Additional Materials
For the entire construction, you will need other materials including;
- PVC piping for moving the waste from the house to the digester and across the three chambers. You will need various piping solutions to cater for the waste and the gas.
- Bend for the slurry accumulated at the end of the digestion.
- Adhesives used for joining the biogas plant. There are several options you can use: Araldite epoxy adhesive, M-Seal epoxy compound, PVC, and solvent cement.
You can also buy other construction materials and clothing for your building needs.
Read More From Dengarden
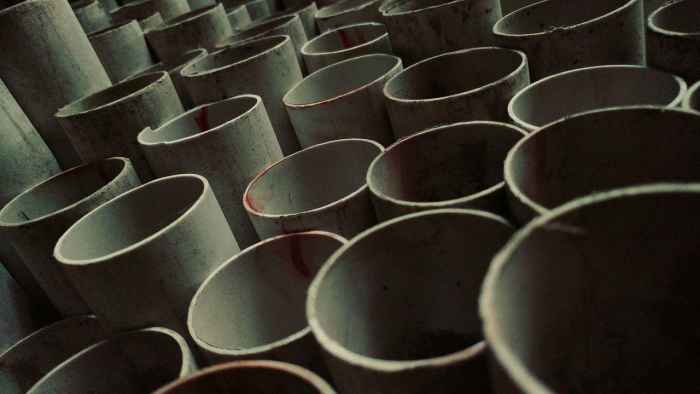
PVC Pipes
Besides the materials used you'll also need various handy tools to help with your construction. They include:
- Hacksaw with a frame
- Single-sided hacksaw blade
- Sharp knife
- Medium-sized hammer
- Set of spanners to tighten the gas pipe connectors
You'll also need hand crimping equipment to connect the ends of the gas pipes.
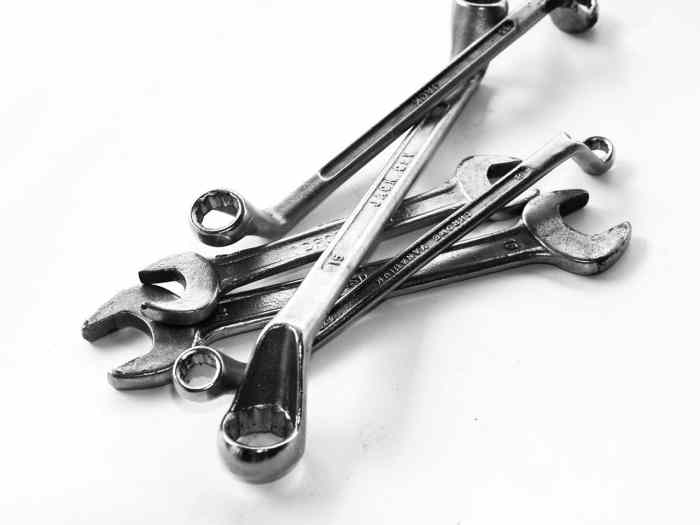
Set of spanner
Step 4: Prepare to Bring the Tanks Together
Because you want to have your biogas tank separate, you'll need to cut a section of the bigger tank to incorporate the gas tank holder. Depending on the capacity of the tank, cut a section of the tank from the top to fit the gasholder.
Using a sharp knife, make a slot along the line and insert a hacksaw blade in the slot and cut along the ridge. The hacksaw blade gets very hot. Wrap the end with a piece of cloth and cut through the ridge. Remove the top cut portion from the tank.
Step 5: Prepare the Digester Tank
The top portion of the digester tank will have to be removed. Just enough for the tank to fit and also the width should allow for the free movement of the gas tank. Place the removed top portion of the gasholder on top of the digester tank.
You'll need to leave some space, preferably about 20 mm on all sides, then mark the guideline for cutting. Using a hacksaw, cut slots on top of the projected portion of the digester tank. With the hacksaw blade, cut along the guideline and remove the top part. Finish the cut edges with sandpaper to smoothen it.
Step 6: Fix the Piping to the Digester Tank
As you read above, you will need various sizes of pipes to cater to the different areas if the digester. For example, the 120 mm dia door elbow needs to be fixed at the bottom of the digester tank. You'll have to place the elbow and mark the cutting line. Make a slot along the line with a sharp knife and insert the hacksaw blade in the slot while cutting along the guideline.
From there, just insert the elbow in place and use one of the adhesives from above to seal the sides of the tank.
Other either that will need a pipe is where the digest/slurry is. The outlet pipe will have to be fixed properly to ensure proper movement and collection of waste. Usually, the pipe is about 30 mm wider than the first pipe. It will be fixed on top of the digester as well.
Using the same procedure, make a cut along the line remove a piece, and fix the piping. Once the outlet pipe is well inserted, use the sealant to attach the sides of the tank.
Step 7: Add the Guides and Supporters for the Movement of the Gas Holder Tank
So that the gasholder can effectively move up and down inside the digester, guides have to be a pit in place. The guides will be like pipes added to the top of the digester along with the other projections and outlets.
Simply, place the piping on top of the projected area, mark and cut through with a hacksaw. Insert it inside and use the sealant again to seal off the sides. Remove any excess. For the supporters, additional guide pipes will be added in alignment with the previous projections. This is only so it can provide a guiding system for the gas.
Step 8: Add the Gas Pipes
Up to that point, you must be overwhelmed with the number of pipes added to the digester. Well, luckily this is the last set of pipes. You will have to connect gas pipes that can effectively collect the accumulates biogas and connect them to your gas lines so you can use them with your home stove.
This pipe will run all the way from the kitchen up to your biogas stove or home gas outlet. You will need three pieces of gas pipes, all about 2.5 meters long. A ball valve, bend, nipple, and adapter all size one. You will need to connect them over the tank step by step while threading and crimping the ends together.
Make sure the pipes you buy at the store are well tested for leaks so you don't experience any difficulties while connecting. A simple trick with water and blowing should do the trick.
After the first phase is done. Let's now connect the gas outlet from the has holder tank in the digester. Assemble all parts required for the gas outlet. Using a sharp knife, make a small hole at the center of the gasholder tank. You can make a neat round hole by just twisting the knife all around. This hole should not be larger than the threaded portion of the accessories.
Use suitable inner and outer washers at all joints. All threads must be covered with Teflon tape. Connect the gas pipe with the bends, then connect to the nipple, then the adapter in the tank. Tighten the joints, being careful not to break. Provide a leak-proof joint by applying epoxy resin over the joint from outside and inside the tank
Step 9: Relocate the Tank
If you had been making the biodigester off-site, this is the best time to take it to its place and fix it permanently. The reason for this is you want to add your slurry pipe which shouldn't be moved because it carries solid content. So fix the tank in its site and move on with the next step.
Suggestions for where you can place the biodigester include:
- Where there's plenty of sunlight.
- Where there's easy access to any feeding waste you'll be adding manually.
- Where it's easy to remove the slurry to be used as fertilizer.
- At a minimum distance for the biogas to travel to the house for household use.
Once everything has been fixed appropriately, it's time to add in the slurry pipe. It should be wide enough for all the digest to move out. For easy collection, you can add a base-collector where you can simply take your fertilizer and go with it to your farm.
Step 10: Add a Waste Feed Pipe
Next up is adding the waste feed pipe. Using the allocated pipe and an elbow, fix the pipe at the end of the biodigester. Apply PVC solvent cement over both the cleaned surfaces. Join them together immediately before the solvent cement dries out. Place the cap on top of the feed pipe.
Step 11: Place the Gas Holder Tank and Finish
We're now approaching the final steps to make your biodigester with a biogas plant. After all the piping and cementing is done, it's time to put in the gas holder tank. Gently lift the gas holder tank and place it over the digester tank so that the 40 mm dia guide couplers fixed on the sides of the gas tank sits over the 32 mm dia couplers on the digester.
Your biodigester should be ready to begin making the environment a better place. But before you pat yourself on your shoulder, it's time you do a trial run to see if at all it's functional.
Step 12: Feed and Test the Biogas Plant
Add in the water you want to add from cow dung, laundry water, toilet flush, or whatever. Remember you can many feeds the tank or you can use the waste from the house. Do not use any chemicalized or treated water as it will kill the microorganisms eating away the organic matter. Leave it overnight with the heat and await it see if anything will happen.
After about 48 hours, you should see gas starting to form in the digester as well as slurry from the waste. Once the gas tank is full, this gas will be released to the atmosphere.
Remember as you're feeding the tank with waste, you want to ensure you're only using suitable things life food leftovers, peels, and the likes. Don't add papers, plastics, or shells ad they don't decompose with the rest of the items. This can offset the decomposition process and the digester won't work properly.
Step 13: Connect the Gas Inlet Pipe
This is the moment you've all been waiting for. Connect the gas inlet pipe and open the knob slightly. You should hear the hissing noise of gas escaping through the burner from the gas outlet you had connected. Check to see the flame is of recommending color and strength.
You can also collect your slurry from the end of the digester. It should not have a pungent smell that attracts houseflies. This is now the organic fertilizer you want to use for your farming and gardening.
This content is accurate and true to the best of the author's knowledge and is not meant to substitute for formal and individualized advice from a qualified professional.
© 2020 Alexander Okelo
Alexander Okelo (author) from Nairobi, Kenya on July 29, 2020:
Hello, Hillary. Thanks for stopping by and for your contribution.
Hillary Damke on July 27, 2020:
Like the Biogas concept for cooking, lighting and other purpose for household, making life so easy and relaxing as we move further for development and ..service delivering for mankind
Can I Increase My Septic Tank For Bigger House
Source: https://dengarden.com/misc/How-to-Build-a-Bio-Digester-Septic-Tank
Posted by: florywitabir.blogspot.com
0 Response to "Can I Increase My Septic Tank For Bigger House"
Post a Comment